
Dev · April 14, 2023
How to cross-sell on the product page without an app
A small add-on checkbox under the add to cart button, built with a Shopify metafield and a bit of theme code. No app needed.
You can offer an optional add-on right under the add to cart button without installing an app.
The shopper sees a checkbox with the add-on product and its price. You control which product shows up through a metafield.
You may need to adjust some elements for your theme.
Step 1: Add the add-on code to the product template
In your theme code, find the product template Liquid file. Paste this underneath the add to cart code:
{% for metafield in product.metafields.details.addon %}
  {% for product in collections.all.products %}
    {% for variant in product.variants %}
      {% if metafield == variant.sku %}
        <label for="Add-on-product-template">Add-on</label>
        <div class="add-on-product-container">
          <div class="product__add-on__top">
            <span class="add-on-element"><input class="add-on-product-checkbox" type="checkbox" name="id[]" value="{{ variant.id }}" /></span>
            <a href="{{ product.url }}"><img src="{{ product.featured_media | img_url: 'x50' }}" class="add-on-image"></a>
            <span class="add-on-element"><strong>Optional: {{ product.title }}</strong></span>
            <span class="add-on-element">+ {{ product.price | money }}</span>
          </div>
        </div>
      {% endif %}
    {% endfor %}
  {% endfor %}
{% endfor %}
Step 2: Add the CSS
Open your theme CSS file and paste this at the bottom:
/* Product Add-on */
.add-on-product-container {
  border-radius: 1px;
  border: 1px solid black;
  margin-bottom: 20px;
  background-color: #fff;
  -webkit-transition: .3s;
  transition: .3s;
  padding: 2px 17px;
}
.product__add-on__top {
  display: flex;
  -webkit-box-align: start;
  align-items: flex-start;
  cursor: pointer;
  min-height: 58px;
  padding: 16px 0;
}
.add-on-product-checkbox {
  width: 22px;
  height: 22px;
  min-width: 22px;
  border: 1px solid #1b437e;
  border-radius: 4px;
  margin-right: 15px;
  transition: .3s;
  background: #fff url(white-checkmark.svg) 50% no-repeat;
  background-size: 0;
}
@media (max-width: 480px) {
  .add-on-image {
    max-width: 50px;
  }
}
.add-on-image {
  display: block;
  margin-right: 15px;
  max-width: 60px;
  margin-top: -5px;
}
Step 3: Create the metafield definition
In Shopify, go to Settings, then Custom data, then Products. Click “Add definition”.
Step 4: Name it
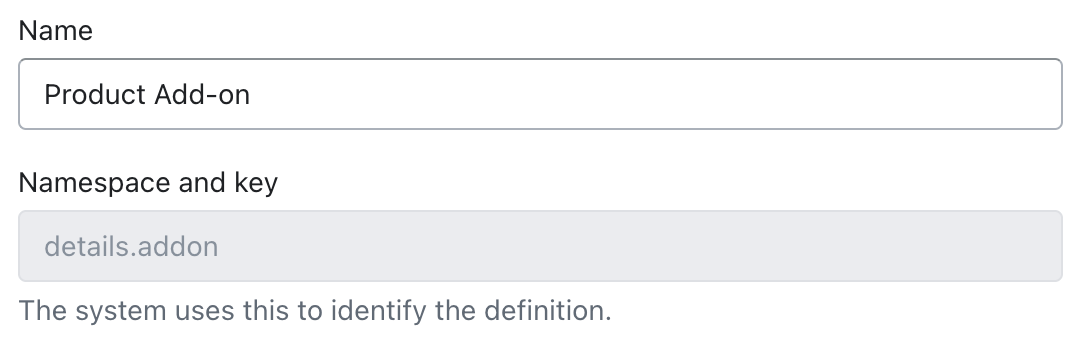
Create a single line text metafield named “Product Add-on”. Set the namespace and key to details.addon.
Step 5: Copy the add-on SKU
Open the product you want to offer as the add-on and copy its SKU.
Step 6: Paste it on the main product
Open the product where you want the add-on to appear. In the metafields section, paste the SKU into “Product Add-on”. Save. You are done.

Want a similar setup built for your store? Book a 30-minute call or email austin@creatorsecom.com.